Convert JPG to HEIC when your next step specifically needs a HEIC image. Choose your photos, adjust the encoding quality if necessary, and inspect the result before downloading. Your original JPG files stay unchanged.
This JPG to HEIC converter creates a new image file, not a renamed copy. Processing runs on your device, and the page checks whether its HEIC encoder can run before starting. If it cannot, you receive an explanation instead of an unexpected upload or a file in the wrong format.
Choose JPG files
JPG and JPEG accepted. Batch and file-size limits are shown beside the picker. Need the opposite conversion? Use HEIC to JPG.
When JPG to HEIC is the right conversion
Sometimes a workflow calls for the same file format as a collection of iPhone photos. You may be testing an image importer, preparing pictures for a HEIC-compatible application, or comparing storage options for a personal collection. In those cases, converting an existing JPG gives you a usable HEIC version without changing the original.
Do not convert solely because you are moving a photograph to an iPhone or Mac. Those devices can also work with JPG. The useful question is whether the destination needs HEIC, not whether the destination has an Apple logo.
| What you need | Sensible choice | Why |
|---|---|---|
| An application specifically requests HEIC | Convert JPG to HEIC | The output is genuinely encoded in the requested format |
| An email attachment or website upload | Keep JPG | The existing file may already suit the recipient |
| A smaller archive | Compare a trial conversion | Size savings depend on the photograph and settings |
| Better detail than the original contains | Keep the original and reconsider the goal | Re-encoding cannot reconstruct lost image information |
| A moving Live Photo | Use a motion-specific workflow | An ordinary JPG does not contain a recorded video |
How to convert JPG to HEIC
1. Select the original photographs
Add JPG or JPEG files using the picker or drag them into the tool. Both extensions are accepted by the same JPG to HEIC converter. You do not need to rename .jpeg files first. Check the displayed filenames so that an edited export is not mistaken for your camera original.
For a large collection, begin with a few representative pictures: one detailed outdoor scene, one indoor photograph, and one image with smooth color transitions. Their results tell you more than repeatedly converting the same easy example.
2. Choose quality and optional dimensions
Start with the default quality. A higher setting usually favors detail, while a lower setting can reduce the output size. The number is an encoder setting, not a percentage of your original quality and not a guarantee of a particular file size.
Leave maximum width and height blank to retain the source dimensions. Enter a limit only when you want a smaller working copy. The image keeps its proportions, and a photograph smaller than your limits is not enlarged. Resizing changes pixel dimensions; encoding quality changes how those pixels are compressed.
3. Convert and inspect the result
Select Convert to HEIC. Each file shows its own progress and result. Compare the original and output sizes, then open the result preview. The preview represents the generated HEIC decoded for display, so you can check the actual conversion rather than an untouched original masquerading as a result.
4. Download the copies you want
Download a single HEIC or collect completed results in a ZIP. A ZIP is a package containing separate images, not a different picture format. Extract it before importing the photographs into an application that expects individual files. If a name is repeated, the downloads receive distinct names instead of overwriting another result.
Inspect one photo before converting a batch
Compare both versions at the same zoom level. Look at hair, foliage, fine lettering, and high-contrast edges. Also check gradients such as skies or softly lit walls. A small preview can hide changes that become visible when the image is enlarged.
Keep the default setting if the result is suitable for your purpose. If fine detail matters more than size, try a higher quality value. If storage matters more, try a lower value and compare again. Always restart from the original JPG when evaluating settings; repeatedly converting a converted copy introduces another variable.
A larger HEIC result is not necessarily an error. A heavily compressed or very small JPG may leave little room for further savings, and file structures have their own overhead. The tool reports the actual result rather than promising that every JPG to HEIC conversion will make a smaller file.
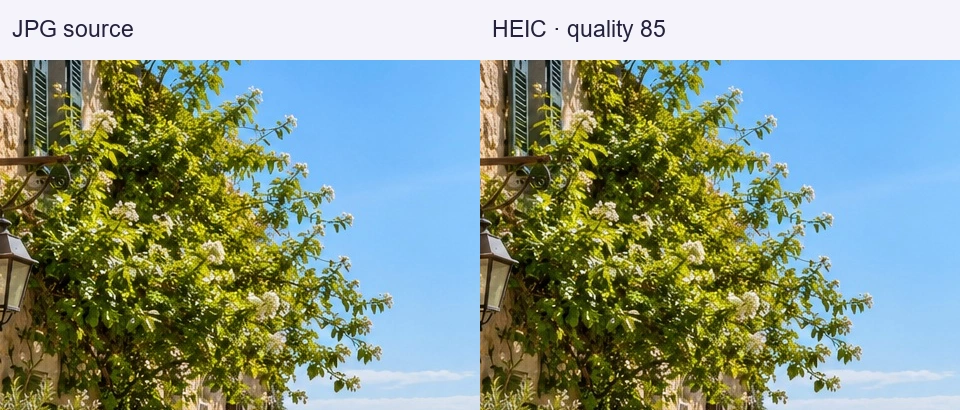
What the new file keeps—and what it does not
The conversion carries the visible photograph into a new HEIC file at the dimensions you choose. It does not recreate camera sensor data, restore clipped highlights, add depth information, or turn the image into Apple ProRAW. An ordinary JPG also cannot supply the motion and audio needed for a Live Photo.
This tool creates a standard-color working copy. It does not promise archival preservation of an original color profile, extended dynamic range, or camera-specific processing information. Keep the source file if those properties matter to your workflow, and evaluate the output in the application where you intend to use it.
Original EXIF, GPS, and descriptive metadata are not copied into the new file. Display orientation is applied to the picture so that removing an orientation tag does not deliberately leave it sideways. Information visibly printed inside the photograph, such as an address or name, remains visible. Removing embedded metadata is not the same as redacting a picture.
Local processing and practical limits
Your image bytes are processed in this browser session rather than sent to our conversion server. The page still needs to load its application files, and local processing still uses your device’s memory and computing power. Large images can therefore take longer than small ones.
Keep the page open until you have downloaded your results. Clearing files or closing the session is not a backup workflow. If the device struggles, use fewer photographs at a time or choose smaller output dimensions. Stopping a batch leaves completed results available, but an unfinished file is not presented as a successful download.
Useful ways to use the converter
For application testing, a JPG to HEIC conversion provides a deliberately generated HEIC input. Record that origin when testing: it is not a substitute for native camera samples containing HDR, auxiliary images, or unusual metadata.
For a personal photo collection, compare the output with the source before committing to a format change. Keep originals separately until you know your storage, backup, and viewing applications can use the new files.
For a handoff, confirm the recipient requested HEIC. If they only need to see the picture, sending the existing JPG may avoid an unnecessary conversion and an extra compatibility check.
JPG to HEIC questions
Is JPEG to HEIC a different conversion?
No. JPG and JPEG are filename extensions for the same image format. This page handles both, with the same quality controls and output checks. There is no need to find a separate JPEG tool.
Does changing the extension to .heic work?
No. Renaming does not change the encoded image inside the file. A receiving application may reject the mismatch. This JPG to HEIC converter creates new HEIC data and checks that output before offering it for download.
Will my HEIC file have better quality than the JPG?
No conversion can recover detail already missing from the JPG. A suitable quality setting can limit additional visible changes, but the original remains the starting point. Keep it when future editing or reliable comparison matters.
Why does a destination app reject the result?
Check that the app accepts HEIC, not just JPG or PNG, and extract the file if it is still inside a ZIP. A valid HEIC file is not a promise that every application supports the format. Try the file in another HEIC-compatible viewer to separate format support from a damaged download.
Can I convert PNG here instead?
Use PNG to HEIC. That page explains its background treatment, which matters for transparent graphics. Keeping the workflows separate makes it clearer what happens to your image before you convert it.